Jul 13, 2016 | class |
Join me for a special Stamping Class on Friday, July 22nd and help me raise money for the Atlanta 2-Day Walk for Breast Cancer. I’ll be walking 30 miles in 2 days on October 15 & 16th. My mother-in-law and sister-in-law have both battled breast cancer and I have several friends in the battle right now.
I’ll be doing several things to raise money over the next few months. Here is the first one –
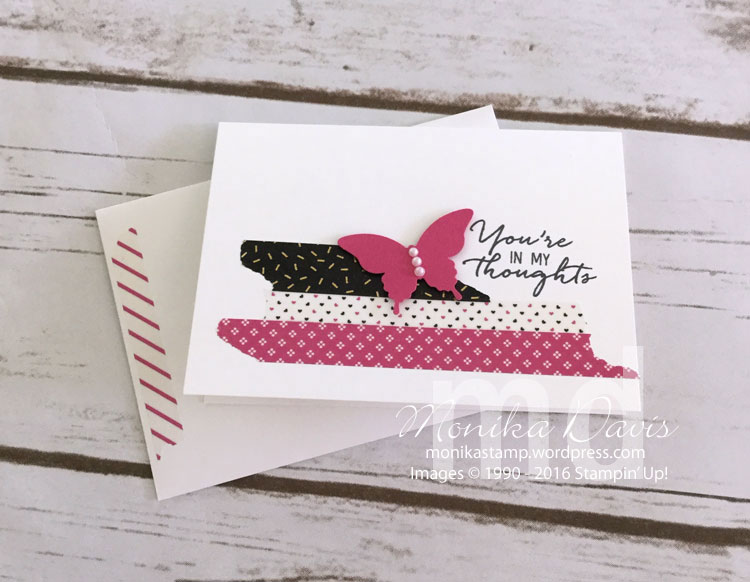
Pop of Pink Class.
Class fee is $15 – ($10 of your class fee will be donated to my walker fund).
If you can not attend the class you can purchase the set of completed cards for $15.
Order PINK items during the month of July, August, and September and I will donate 25% of the product price to my walker fund. That includes items in the following colors – Flirty Flamingo, Melon Mambo, Blushing Bride, Pink Pirouette, and Rose Red. Items in the Pop of Pink Product Suite.
Donate directly on my 2day walk website – CLICK HERE.
Please bring your own adhesive to class (or plan to purchase some from my Adhesive Store).
The class will be held twice – at 10 AM and at 7 PM. Please RSVP on my website – EVENTS SCHEDULE.

Jan 26, 2016 | 2016 Occasions catalog, class, Class by Mail, Uncategorized |
My February Hands-on class is going to feature the Grateful Bunch Bundle from the Occasions Catalog. I’ll be holding a live class here at my house on February 12th – come for the morning class at 10:00 AM or the evening class at 7:00 PM. Plus I’ll be offering this as a CLASS BY MAIL option. Payments will be due by February 12th, then I’ll order everything, receive the orders, prepare your packets and mail them back out to you.

Techniques in this class include using the Sponge Dauber and Paper Piercing.
So here are the options for you:
Attend Live class at my house – details and RSVP information can be found on my website
CLASS IN THE MAIL OPTION – Payments due by Feb. 12, 2016.
Each option has a Buy Now button that will take you to Paypal.
Option A: $45 includes Grateful Bunch Bundle (stamp set and punch), class materials to complete all 5 project, Priority Flat rate shipping.

Option B: $65 includes Grateful Bunch Bundle (stamp set and punch), Stamp & Pierce Mat, Piercing Tool, Updated Essentials Piercing Templates, class materials, to complete all 5 projects, Priority Flat rate shipping PLUS one free Sale-A-Bration item – (suggested item is Perfect Pairings stamp set). Include your Sale-a-Bration choice.
The Class in the Mail options do not include ink, adhesive, sponge dauber or the little vase for the photo holder.
Jan 8, 2016 | Cards, class, Uncategorized |
Start of the year by attending this class and creating a Tin of cards! Create cards for a variety of occasions. Includes supplies for 16 cards (4 each of 4 designs) with dividers and a cute organizing tin.
Then you’ll have a place to keep all the cards that you make throughout the year so you can find what you need when you need it!

Tin of Cards
Stamping Class
Stamping with Monika
DATE: Sunday, January 24, 2016
TIME: 1:00 pm – 4:00 pm
RSVP and payment due by January 12th.
Click here for more details and to RSVPClass fee is $38. This is a PREPAID Class – all fees are due by January 12th.
Class will be held on Sunday January 24th.
After I receive your RSVP I will send you a Paypal invoice to complete the payment for the class.
Includes – supplies for 16 cards, envelopes, tin box with lid, 9 dividers, Multipurpose Liquid Glue.
Jan 7, 2016 | class, Paper Pumpkin, Sale-A-Bration 2016 |
Hey, have you heard the good news? Paper Pumpkin 3-month subscriptions are on sale! Plus, you can choose a FREE Sale-A-Bration item. Win-win!

And this sale applies to everyone – current and new subscribers. Here is how it works.
- add a 3-month Pre-paid Subscription – Item # 137859 to an order – it can be a workshop order, club order, class order or online order. You’ll pay for it then $55 (plus tax) – shipping is already included.
- once the order is complete you will receive an email with a Prepaid Code
- Login to your account (or create one if you are new) at PaperPumpkin.com
- Look for the box that says Enter Prepaid Code

- Enter the code from your email
- Your account will then look like this

- After the three months are over your account will revert back to a month-to-month subscription and be charged to the credit card on file in your account.
- If you don’t want to continue or you want to skip a month then click on the button that says MANAGE MY ACCOUNT – you have the option to skip a month or to cancel your subscription.
The December Kit was a 2016 Calendar! It is so cute and the most popular kit yet. As soon as the refills were available for sale they sold out! If you are local to me and you want to make one of these cute calendars you are in luck – I have a limited number of kits available and will be having a little class this Sunday, January 10th to make them. See the information HERE and let me know if you want to come.

Once you are done with the month these would be perfect to add to a scrapbook – especially a Project Life Scrapbook. Each month could be the first card for that month’s pages.
With the left over pieces I had from my kit I decided to create a little note card by adding some Designer Paper. Here is how it turned out:

Here are the supplies that I added to the Paper Pumpkin One Great Year refill to create the notecard:
Product List
Links by TheseAreMyStamps.com
Don’t forget – order your prepaid subscription while it’s on sale. Update your account and join me for my class on Sunday if you missed this great 2016 Calendar in the December kit.
Thanks for stopping in today.
Dec 23, 2015 | Christmas, class, Holiday catalog 2015, Tags |
I saw a snowman jar filled with peppermints somewhere – either Facebook or Pinterest. It was simple with a black hat and scarf on a jar. I decided I wanted to create one and fill it with tags. So now what to do for the tags – I had a stack of 1″ Whisper White strips of card stock on my craft table left from another project – well my stamp a stack class so I had a bunch. I decided to use those and make some abstract snowman tags.

Everyone in my Wrapping up the Holidays class got to make one of these jars and a dozen of the tags.
The hat on the jar is made with the Circle Framelits – a brim and a top and then a strip to wrap around for the side of the hat. I decided to put a hinge on the top of my hat so that you could just lift it up and pull out the tags without unscrewing the lid.

The tags are my favorite part and so simple. I stamped the three dots from the Snow Place stamp set. I guess they are 3 little lumps of coal. I cut the hats from the framelits and just punched a little hole in the top. I strung the hat on the baker’s twine and then through the tag. The hat swings. To finish tie a piece of ribbon around the tag and stamp the back with to/from.

Cute and quick and simple.
Thanks for stopping by today. I still need to wrap presents for Christmas and I have yet to mail out any Christmas cards – yikes! Maybe Christmas Eve will be the day they go out. That is pretty much the norm for me though.
Oct 21, 2015 | Big Shot, class, Holiday catalog 2015 |
He’s here. The third card for my “Reclaimed Wood” collection. I have more ideas to work on but this is the third one – a Snowman. The other two – the scarecrow and Frankenstein I’ve already shared. This one I actually created two versions – one I used for my Christmas Card Stamp-a-stack that I had last week and the other was a slightly stepped up version that I did for a swap group. So let me introduce the Skinny Snowman –

Isn’t he fun! And you might never guess where the eyes and nose come from or the trick for the mouth so I’ll tell you! I used the Square Pillow Box Thinlits Dies – the little decorative pieces for the details on this snowman. There is a little strip with tiny pumpkins – snip off the stem and ta-da you have some tiny oval eyes! Then the little strip with the trees – snip off the trunk and then you get the little pointy nose! I also used the snowflake element to decorate the hat. To create his smiley mouth I used my Project Life Journaling pen and traced one of my button containers – it was just the right size and shape to give him a big smile.
This is a skinny card – the base is 3″ wide – Basic Black and then I cut Whisper White strips which are stamped in VersaMark ink with the Hardwood Stamp – it is really light and in real life looks like white-washed wood. The brim of the black hat is a 4-1/4″ wide strip – so once you add that the card fits perfectly in our medium sized envelopes.
Here is my stepped-up version.

Can you see the difference? It’s not easy to see on the photos but I added some embossing. I stamped snowflakes on the top of the hat and embossed with clear embossing powder. The brim of the hat is embossed with the Hardwood stamp. Here is a closer look:

it just dresses him up just a bit. But I left that off when I held my Stamp a Stack class because I wanted to simplify it for them – they had a lot of cards to make that day. You could simplify even more by leaving off the Jolly & Bright from the top of the hat.
Here is a list of all the supplies:
Product List
Links by TheseAreMyStamps.com
Don’t forget about the stamp sale going on this week – through Friday!

Thanks for visiting today.


